Introduction
To further simplify the development of a Webflow site, it is often necessary to create certain pages or sections of a website. Webflow allows us to build sections in the form of components (formerly known as symbols), which can then be easily reused throughout the website.
What is a custom component on Webflow?
A custom component is a reusable element on a website. It can be a banner, a form, a menu or any other element. Custom components can be used on multiple pages of your Webflow site, enabling you to create a consistent, easy-to-navigate design for users.
Why create custom components on Webflow?
There are many advantages to creating custom components on Webflow. Here are just a few reasons why you should create custom components for your Webflow site:
- Improve the user-friendliness of your Web site
- Custom components are reusable and can be used on multiple pages of your website. This means you can create a consistent user experience for your visitors. Visitors can easily navigate your website and find what they re looking for.
- Save time
- Creating custom components on Webflow can save you time (and therefore money 😉 ). Instead of creating each element individually on each page of your website, you can create a custom component and use it on multiple pages. This saves you precious time by avoiding having to recreate the same elements over and over again.
- Increase the flexibility of your Webflow site
- Custom components on Webflow are highly flexible. You can customize them to meet your specific needs and use them for different projects. This means you can use the same custom components for different Webflow sites.
How to create custom components on Webflow
Now that you know why it s important to create custom components on Webflow, here s how you can do it:
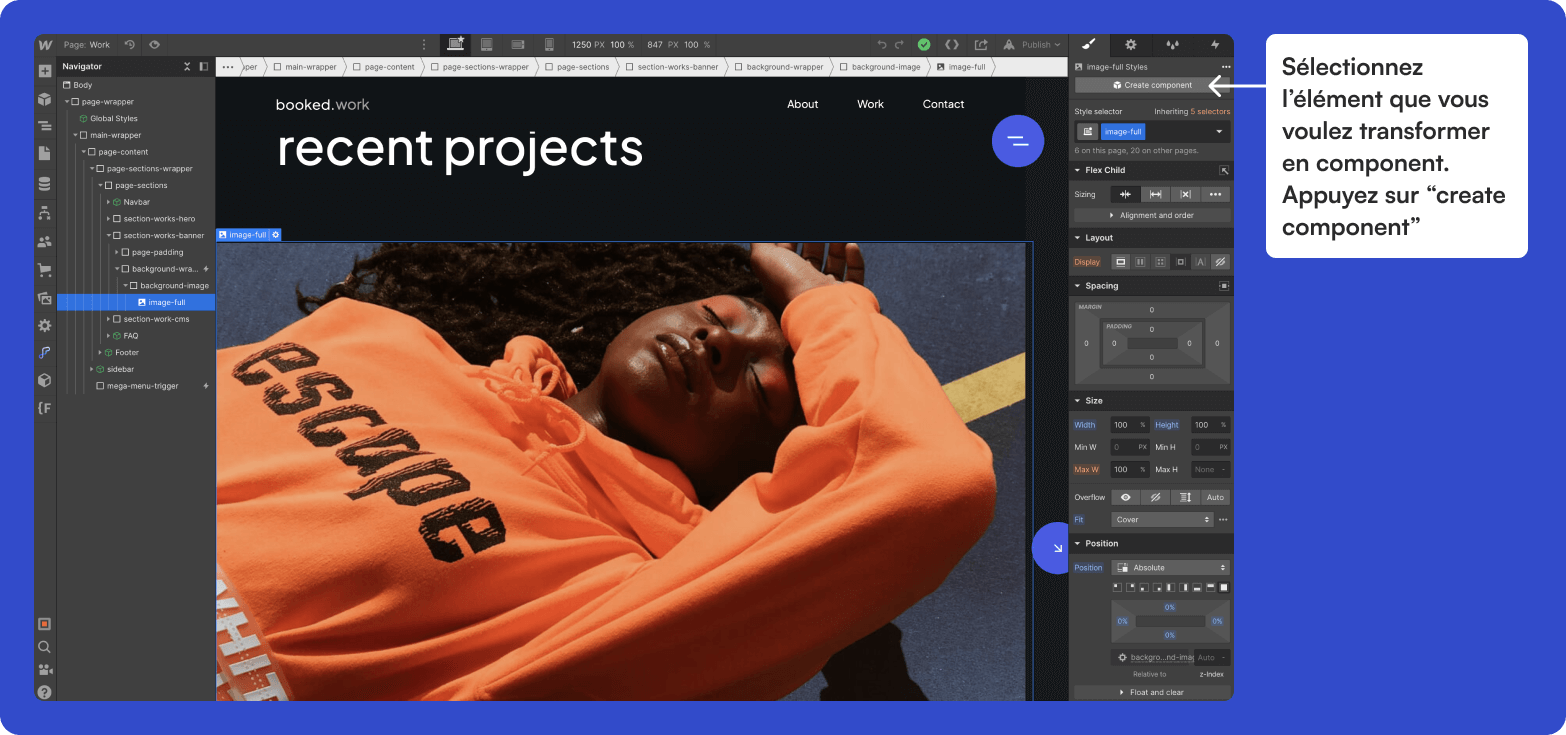
1. create a custom component
To create a custom component on Webflow, select the element you want to turn into a component and click on "create component". Give your custom component a name and add all the elements you need.
2. customize your component
Once you ve created your custom component, you can customize it to suit your needs. You can modify colors, fonts, sizes and styles to suit your specific needs.
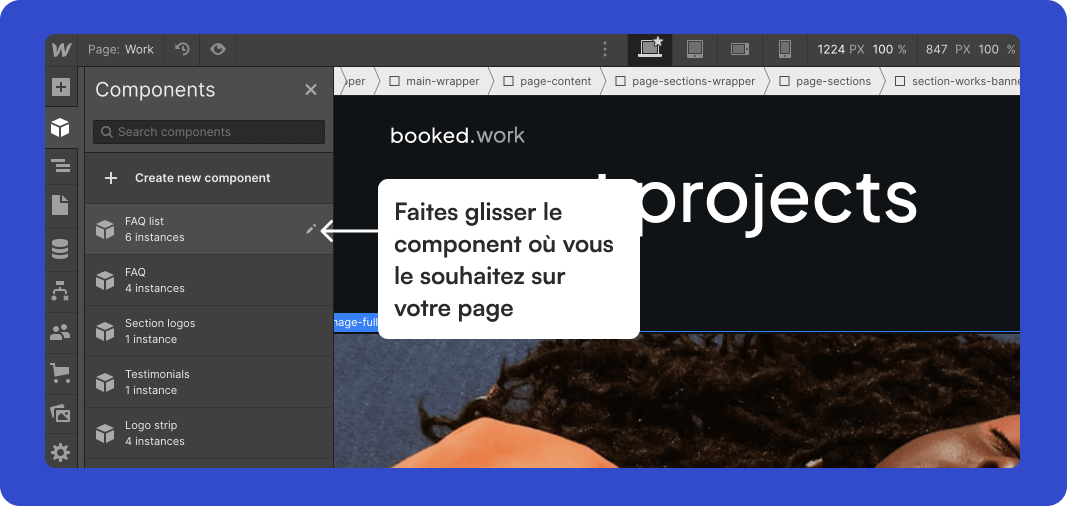
3. reuse your custom component
You can use it on several pages of your website. To do so, go to the "components" section and drag and drop the desired element anywhere on the page.
Conclusion
Webflow s "Component" functionality can therefore be extremely useful for easily creating and customizing reusable elements on your website, while retaining great flexibility and total control over their appearance. Now that you know how to create and modify a component on Webflow, you can build your site in an organized and efficient way, while saving time and increasing productivity during the design of your website. So why not give this advanced Webflow feature a try now, and dramatically improve your web design process?