Transform your Figma creations into functional Webflow sites easily
If you are a designer and you use Figma for your creations, you certainly appreciate its power and ease of use for designing website designs. However, once your Figma designs are complete, transitioning to a live web format often requires significant manual effort, such as recreating each design component in the website builder of your choice.
Fortunately, there is a more efficient way to put your Figma creations online. By using a plugin to convert Figma to Webflow, you save valuable time and energy, allowing you to focus more on honing your design skills.
In this article, we'll guide you through the process of using such a plugin to effortlessly transform your Figma designs into a functional Webflow site.
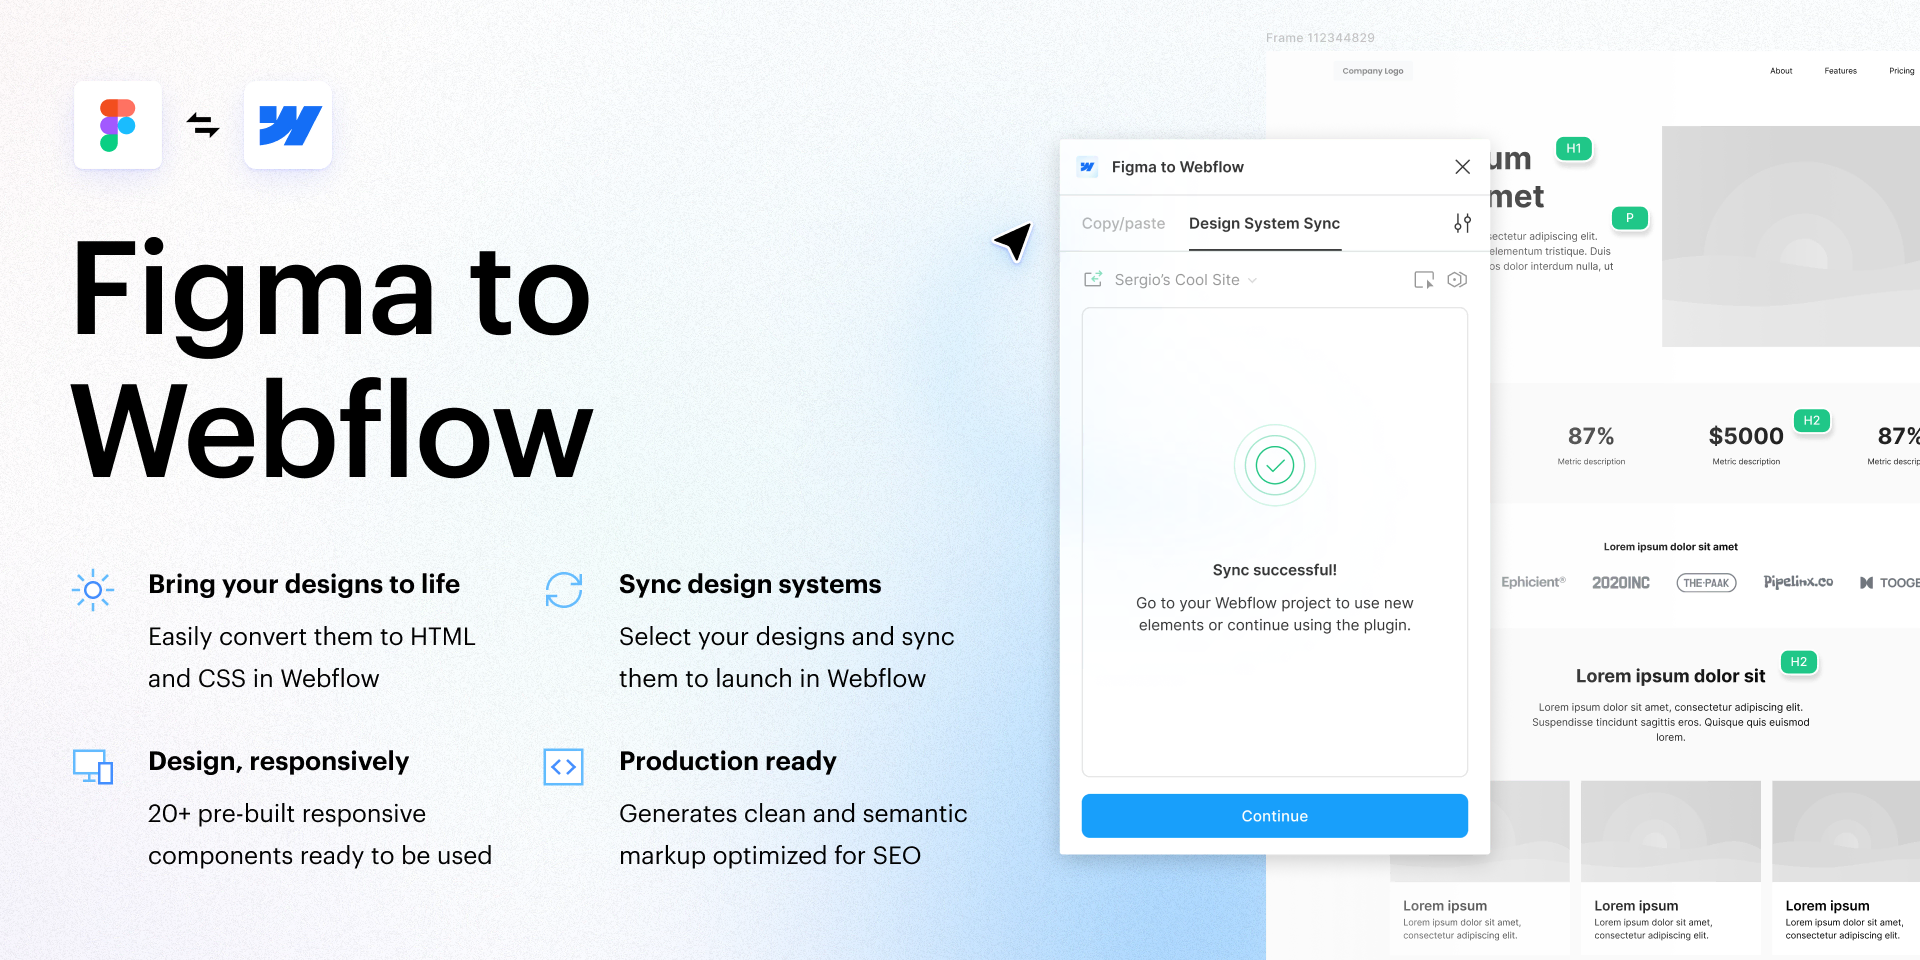
Expertly created by Webflow, the Figma to Webflow plugin allows you to smoothly translate your Figma designs into Webflow compatible CSS and HTML code. This plugin makes it easy to transfer your meticulously designed Figma layouts into responsive flexbox structures within your Webflow projects.
Once your design takes on its new digital form in Webflow, you can start enriching it with content using Webflow's powerful CMS, ultimately leading to the launch of the site. The plugin supports a wide range of design elements, including typography, border styles, shadows, shadows, auto-layout specifications, absolute positioning, image integration, opacity settings, line gradients, line gradients, background images, and the conversion of shapes and vector graphics to SVG.
It also offers a plethora of additional features, including over 20 responsive structures and pre-built layouts, automatic generation of your style guide, support for exporting vector nodes in SVGs, and support for over 50 CSS declarations.
It is important to note that while the Figma to Webflow plugin speeds up some processes, it should not be considered a magic one-click solution that will instantly transform your Figma designs into a fully functional and impacting Webflow site. Building a successful website requires careful thought and additional work beyond simply transferring design elements. If you can't do it alone, you can always partner with a Webflow agency to get the website of your dreams.
ㅤ
Configuring the Figma to Webflow plugin
Setting up the Figma to Webflow plugin is a simple process. Keep in mind that this is only the first step in unlocking its full abilities.
Here's a step-by-step installation guide to help you set everything up:
Step 1. Create a Figma account
If you are here, you are probably already a Figma user. However, if you have not yet registered, please register on figma.com.
Step 2. Start the Plugin
After clicking “Try”, a new Figma design file will open. Here, select the “Run” option. This step will cause the plugin to request authorization from your Webflow account.
Step 3. Authorize your sites
Decide which Webflow projects you want to authorize for the Figma to Webflow plugin. If you have multiple projects, take a moment to select the relevant ones. Alternatively, you can authorize the plugin for your entire Webflow workspace.
Once you have made your choice, click on “Allow application.”
Step 4. Access the Plugin in Figma
If the plugin does not open automatically in your Figma application, navigate to “Resources” and select the “Plugins” tab.
From there, click “Run” for the Figma to Webflow plugin.
BOOM... You have now successfully installed the plugin!
Installing the plugin is just the beginning. What happens next?
When working with the Figma to Webflow plugin and integrating various design elements, it is crucial to consider the following points in more detail.
Detailed management of design elements when switching to Webflow
- Auto-layout
Auto-layout in Figma is a powerful feature that dynamically organizes and resizes items. During the transition to Webflow, ensure that the auto-layout settings are accurately maintained. Pay close attention to how elements resize and adapt to the new environment, and make the necessary adjustments to ensure a consistent and responsive layout. - Custom fonts
Custom fonts can define the look and feel of your design. When transferring your design from Figma to Webflow, carefully review custom font management. Ensure that they are not only imported correctly but also displayed accurately in the Webflow environment. Verify that the selected fonts are available in the Webflow font library or make arrangements to download custom fonts, if necessary, to maintain design fidelity. - Classes
Classes in Figma help define style rules for elements. When transferring your design to Webflow, it is crucial to ensure that these classes are preserved and mapped. This ensures that the stylistic consistency you've established in Figma is carried seamlessly to Webflow, simplifying the design to development process. - Images
Images are fundamental to web design, and their quality and placement are crucial. When uploading your design, make sure the images are transferred seamlessly. Pay particular attention to aspects such as optimizing images, ensuring that images maintain their quality while loading efficiently. Verify that the images are correctly positioned in your Webflow project, taking care to maintain the visual integrity of your design. - HTML tags
Interpreting HTML tags correctly is critical to maintaining the structural integrity of your design. Make sure that the HTML structure generated by the Figma to Webflow plugin corresponds to the expected hierarchy of your design. This includes ensuring that headers, paragraphs, lists, and other HTML elements are correctly translated to Webflow, as these elements play a crucial role in both design and accessibility. - Fond
Background elements, including gradients and images, contribute significantly to the overall aesthetic of your design. During the transition to Webflow, ensure that these core elements are accurately reproduced. Pay close attention to how the gradients are rendered and whether the background images are properly placed and sized. Ensuring the accurate transfer of background elements maintains the visual appeal of your design.
Taking a detailed approach to these considerations will help you make a smooth transition from Figma to Webflow, maintaining the essence of your design and ensuring a consistent user experience on the web.
How to uninstall the Figma to Webflow plugin
Uninstalling the Figma to Webflow plugin can seem like a complex task, especially if it's the first time you're doing it. However, with a well-defined procedure, this can be done quickly and without problems.
To uninstall the Figma to Webflow plugin from your workspace, follow these steps carefully:
- Step 1. Go to account settings
Start by clicking on the “Account” dropdown menu located in the navigation bar of your Figma workspace.
Select “Workspaces”: From the dropdown menu, select “Workspaces” to access your workspace settings.
Navigate to integrations: In your workspace settings, locate and click on the “Integrations” tab. This is where you manage all of the integrations related to your workspace. - Step 2. Choose the right workspace
If you have multiple workspaces, select the specific space from which you want to remove the plugin in the section called “Approved Apps.” - Step 3. Revoke access
In the list of approved applications, find the “Webflow from Figma to Site” application.
Click on it, and you should see an option to “Revoke” access. Select this option to uninstall the plugin from your workspace.
How to remove the plugin from your website
To remove the Figma to Webflow plugin from a specific website, follow these detailed steps:
- Step 1. Access your Webflow dashboard
Start by logging into your Webflow account and accessing your dashboard. - Step 2. Identify the site
In your list of websites, identify the site from which you want to remove the plugin. Click on the “three disclosure points” (usually represented by an ellipse) next to the site name. - Step 3. Go to site settings
In the dropdown menu that appears, click on “Settings” to access the settings specific to the chosen site. - Step 4. Navigate to integrations
In the site settings, navigate to the “Site Settings” section. Here you will find a sub-section called “Integrations.” Click on it. - Step 5. Access approved applications
Under “Integrations,” select “Approved Apps.” This is where you manage the plugins and integrations associated with your website. - Step 6. View account integration settings
To access account-level integration settings for this site, click on the “View” option. - Step 7. Access authorized applications
In the account integration settings, click “Account Settings.” This is where you manage all the applications that are authorized for this specific website. - Step 8. Revoke access
Locate the “Webflow from Figma to Site” application in the list of authorized applications. To remove the plugin, select the “Revoke” option associated with it.
By following these comprehensive steps, you can successfully uninstall the Figma to Webflow plugin from your Figma workspace and your specific Webflow site, ensuring a clean and incident-free withdrawal process.
Conclusion
Improving your site design process can be achieved through the seamless integration of Figma and Webflow. By using a reliable plugin, you can transfer your designs from Figma to Webflow in just a few clicks.