Announced at Webflow Conf 2023, the integration of Spline into Webflow - the promising fusion of Spline s intuitive 3D modeling and the power of Webflow - is a real boon for designers looking to bring their websites to life with a touch of modernity and interactivity.
Revealed at Webflow Conf 2023, Spline s integration into Webflow marks a promising alliance. This fusion combines Spline s intuitive 3D modeling with Webflow s robustness, offering designers an exceptional opportunity to enrich their websites with a modern, interactive dimension.
What is Spline s integration into Webflow?
Spline, with its streamlined user interface and 3D modeling tools, is now seamlessly integrated into Webflow. This integration allows you to insert interactive 3D elements with ease into your web design projects, eliminating the need for complex coding or additional plugins. In short, no more headaches!
How do you integrate Spline into your Webflow projects? A step-by-step guide
1. Get started with Spline
Register or log on to Spline and create your 3D element. You can also import an existing one.
2. Preparing your file for Webflow
Proper preparation of your Spline file is crucial for successful integration into Webflow:
Precise naming
This is the foundation of every project: make sure that every element of your 3D creation is correctly named. This may seem elementary, but it s essential to avoid confusion later on.
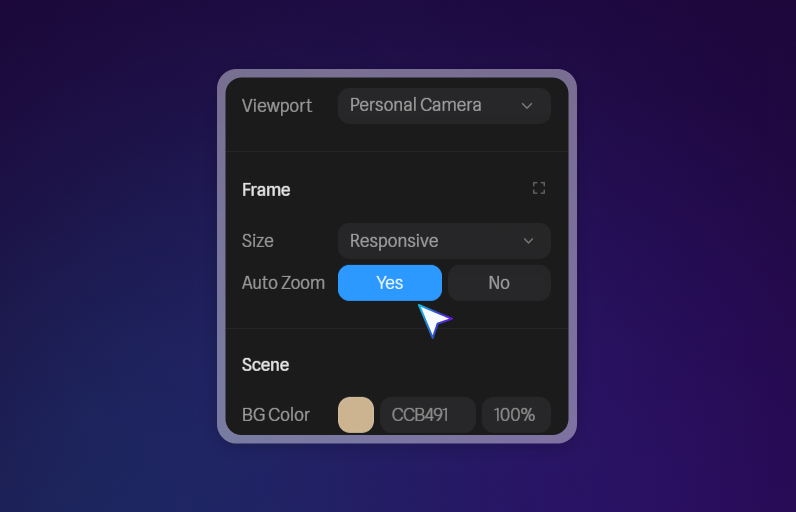
Activate auto-zoom
In Spline s right-hand panel, select your frame and activate the auto-zoom option. This ensures that your element adapts smoothly to all devices and provides your user with a high-quality, immersive 3D experience.
Export intelligently
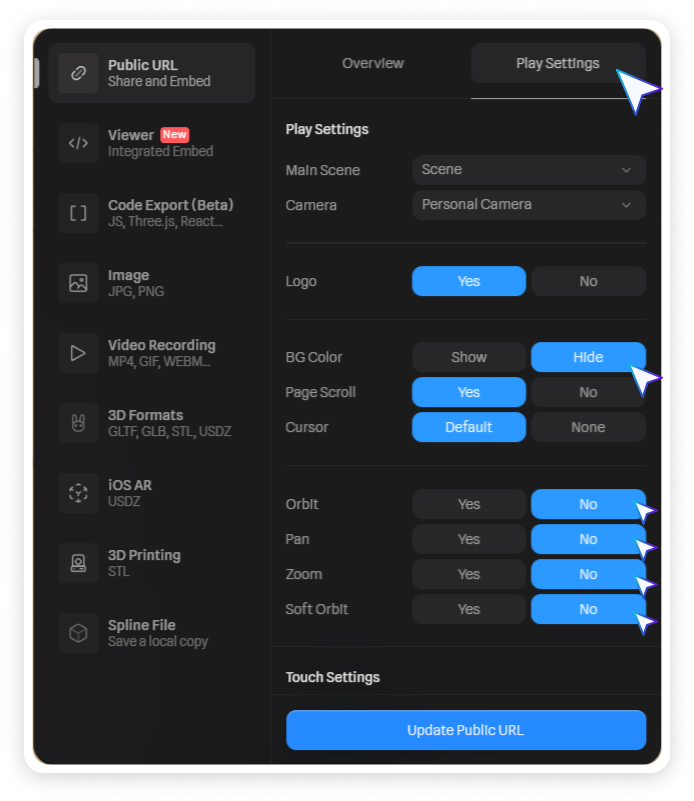
Click on export , then in play settings , choose hide background to obtain an element with a transparent background. Also disable options such as orbit , pan , zoom and soft orbit for more precise control.
Save changes
Don t forget to save the changes you ve made, to preserve the configuration of your element.
Copy your element link
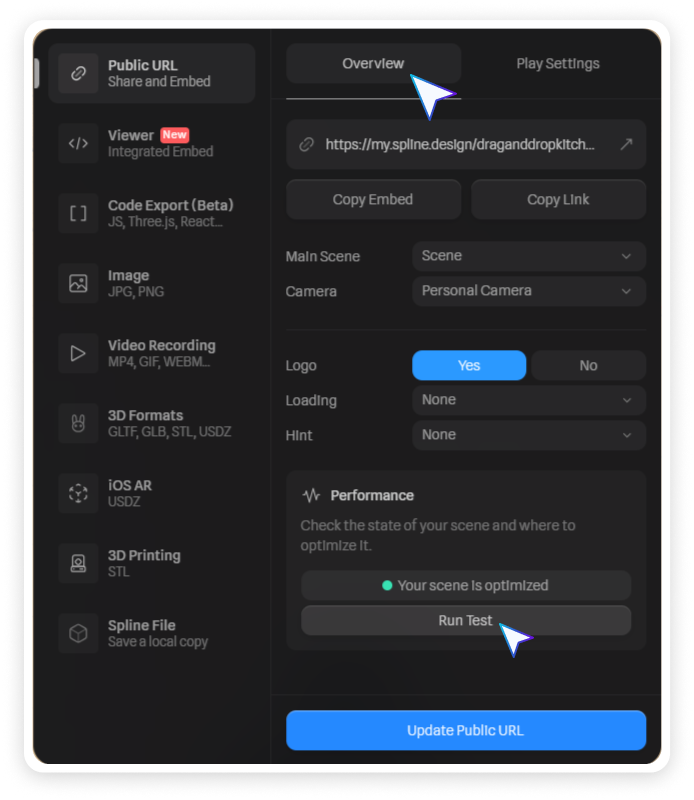
In the Overview tab, copy the link to your 3D element for use in Webflow.
Warning: 3D is a real game changer, but it can affect the performance of your website. Fortunately, Spline lets you keep an eye on performance via the Overview > viewer > performance > run test tab. You ll get a performance audit and tips on how to optimize it.
3. Integration in Webflow
Add your 3D element
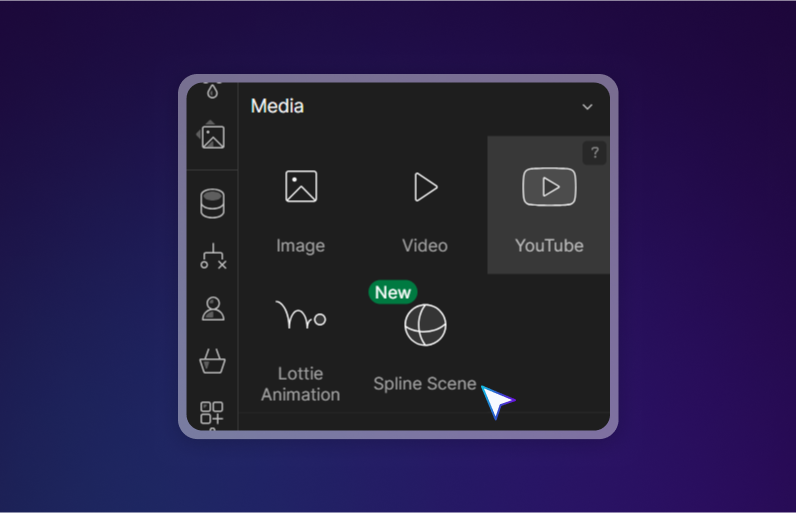
Open Webflow, drag the spline scene element into your page and paste the link to your element. Don t forget to assign a class to your scene for greater control in your website.
Animate to your heart s content
Choose the action on which your 3D element will animate by navigating to element trigger in the right-hand side panel. You ll find a host of options based on user interaction:
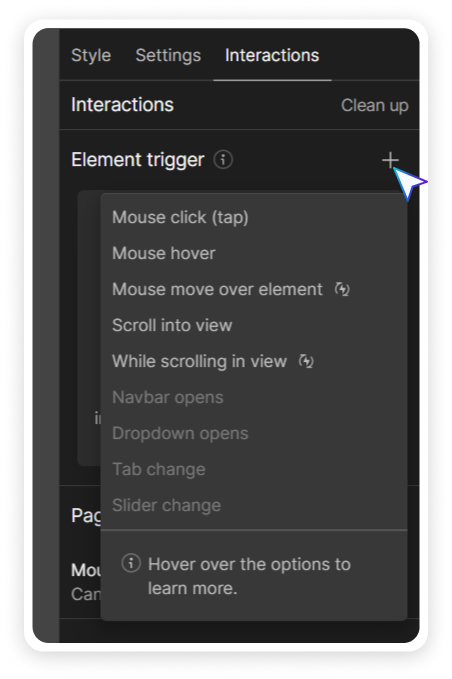
Customize animation
Create a new animation and give it a name that resonates with its action.
Integrate and animate
Select your Spline element and click on the + in scroll action to choose integration > Spline .
You can then go to the object category to choose the element you wish to animate.
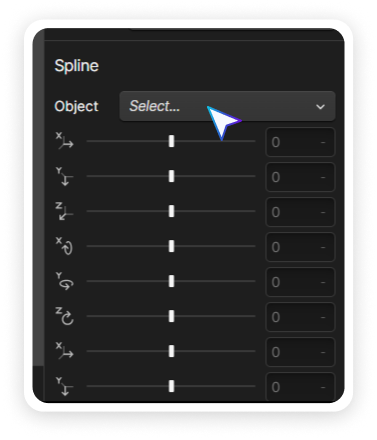
Adjust and test
Set the default state of your element and experiment with different states and animations. Experimentation is key. Don t hesitate to test different animations to find the one that s right for your site.
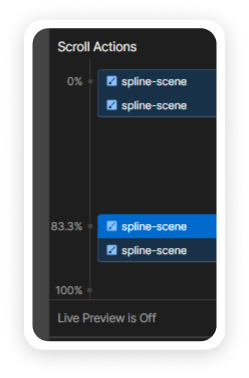
Tip: Use the live preview is on option to see your changes in real time.

Take a look at the Cohort website for a preview (made in Ouiflow of course 😉 ).

In a nutshell
Spline s integration into Webflow is more than just a technical update; it s an invitation to rethink web design. Feel free to combine the action of your 3D element with scroll, button hover or page change. There s a whole host of possibilities to make your website memorable! It s an opportunity for designers to stand out, innovate and create websites that are not just functional, but truly captivating. At Ouiflow, we re looking forward to using this new combination to make your websites even more breathtaking, and to push back the boundaries of creativity.


